
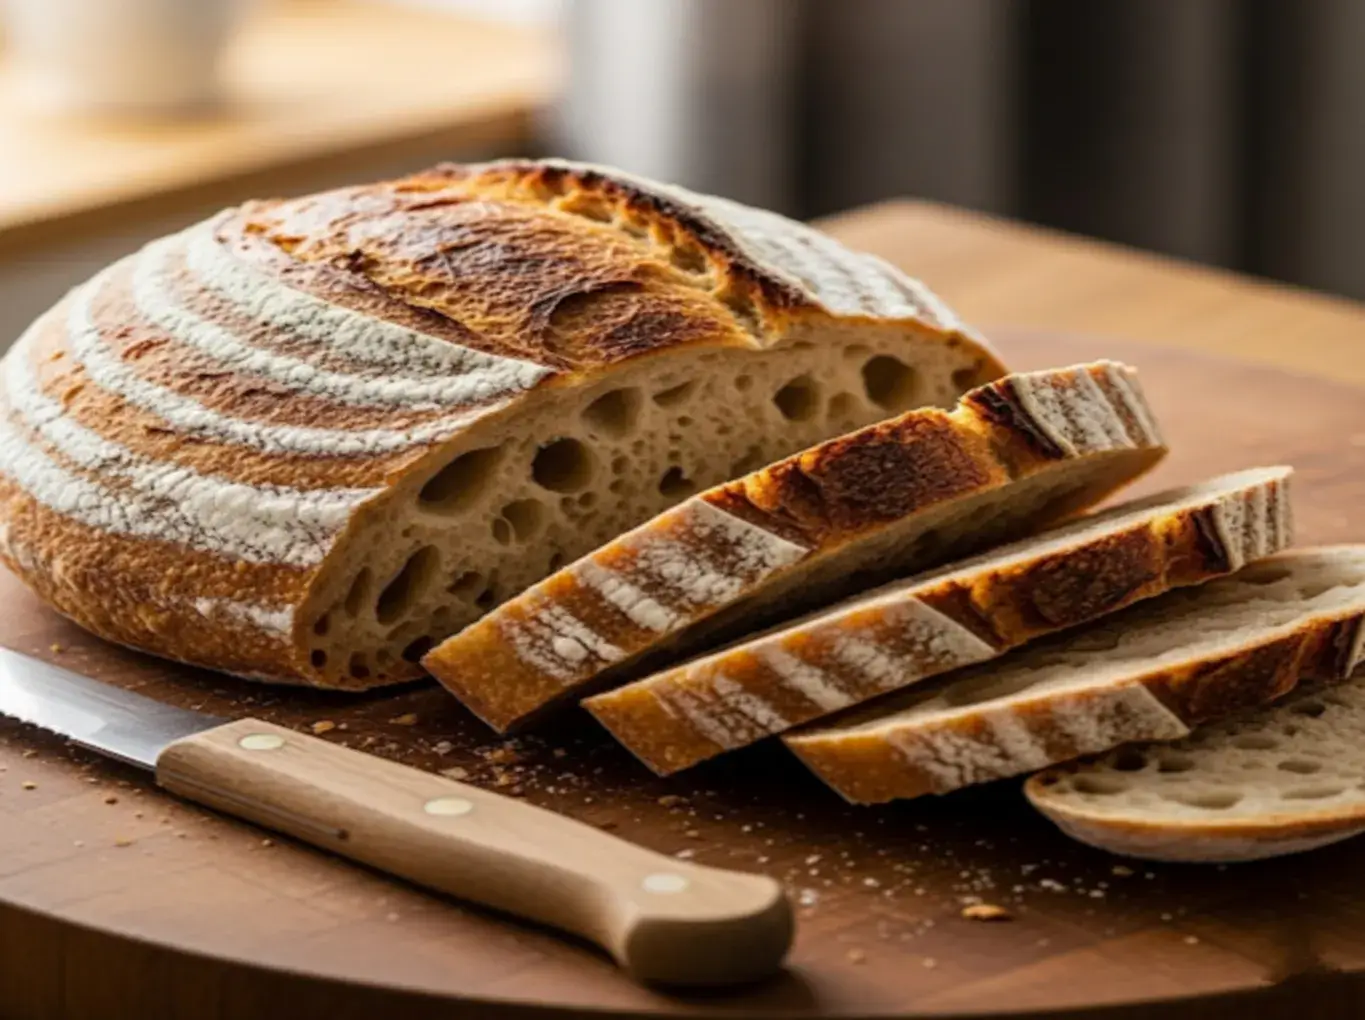
Gluten-Free Sourdough Bread is more than just a recipe; it’s a revelation for anyone who has ever struggled to find bread that tastes as good as it looks. With its golden, crackly crust and soft, airy crumb, this bread delivers the tangy, comforting flavor of traditional sourdough without a trace of gluten.
For years, I believed gluten-free bread had to be dense, crumbly, and disappointing. But after experimenting with different flours and fermentation techniques, I discovered a way to bake a loaf that rivals bakery-style sourdough. Today, I’ll show you exactly how to make it at home, step by step, so you can enjoy slices of warm, wholesome bread fresh from your oven.
WHY MAKE THIS GLUTEN-FREE SOURDOUGH BREAD RECIPE
- Better Texture & Flavor: Unlike many store-bought GF breads, homemade sourdough has depth of flavor and a soft, bouncy interior.
- Healthier Digestion: The fermentation process makes it easier on the stomach, even for those sensitive to gluten.
- Naturally Preserved: Sourdough’s acidity helps the bread stay fresher longer.
- Customizable: You can adapt the flour blend, hydration, and size to suit your needs.
- Rewarding Baking Experience: There’s nothing like pulling a beautiful golden loaf from your oven!

GLUTEN-FREE SOURDOUGH BREAD
- Total Time: 6–8 hours
- Yield: 1 loaf 1x
Description
A hearty and tangy gluten-free sourdough bread made with a bubbly starter, perfect for sandwiches, toast, or serving alongside soups.
Ingredients
- 1 cup active gluten-free sourdough starter
- 1 1/2 cups warm water
- 3 cups gluten-free all-purpose flour blend (with xanthan gum)
- 1 cup gluten-free oat flour
- 1/4 cup ground flaxseed
- 1 tablespoon honey or maple syrup
- 2 teaspoons salt
- 1 tablespoon olive oil
Instructions
- 1. In a large mixing bowl, combine the active sourdough starter with warm water and stir until dissolved.
- 2. Add gluten-free flour blend, oat flour, flaxseed, honey, salt, and olive oil. Mix until a thick, sticky dough forms.
- 3. Cover the bowl with a damp towel and let rest at room temperature for 30 minutes.
- 4. Stretch and fold the dough with a wet hand a few times to build structure.
- 5. Cover again and allow to rise for 4–6 hours, or until nearly doubled in size and airy.
- 6. Line a loaf pan with parchment paper and transfer dough into the pan. Smooth the top with a spatula.
- 7. Cover and let rise for 1–2 more hours, until the dough has risen slightly.
- 8. Preheat oven to 425°F (220°C). Place a small pan of water on the bottom rack of the oven for steam.
- 9. Bake bread for 45–50 minutes, or until golden brown and internal temperature reaches 205°F (96°C).
- 10. Cool completely on a wire rack before slicing.
Notes
- Use a gluten-free flour blend with xanthan gum for the best texture and structure.
- An active, bubbly starter is essential for proper rise and sour flavor.
- This bread keeps best sliced and frozen — toast directly from the freezer for fresh-tasting bread anytime.
- Prep Time: 30 minutes (plus rise time)
- Cook Time: 50 minutes
- Category: Bread
- Method: Baking
- Cuisine: American
Nutrition
- Serving Size: 1 slice
- Calories: 160
- Sugar: 2g
- Sodium: 230mg
- Fat: 4g
- Saturated Fat: 0.5g
- Unsaturated Fat: 3.5g
- Trans Fat: 0g
- Carbohydrates: 30g
- Fiber: 3g
- Protein: 4g
- Cholesterol: 0mg
Keywords: gluten free sourdough, bread, gluten-free baking, homemade sourdough
HOW TO MAKE GLUTEN-FREE SOURDOUGH BREAD
INGREDIENTS:
- 150g active gluten-free sourdough starter (fed and bubbly)
- 300g warm water (around 95-100°F / 35-38°C)
- 20g psyllium husk powder (not whole psyllium husks)
- 10g olive oil
- 300g gluten-free bread flour blend (look for blends designed for yeast breads, or a mix of brown rice, sorghum, and tapioca flours)
- 10g salt (fine sea salt is best)
- Optional: 5g sugar or maple syrup (can help activate the yeast and improve crust color)
- Extra gluten-free flour for dusting
DIRECTIONS:
Step 1: The Initial Mix (Autolyse + Bulk Ferment Start)
- In a large mixing bowl, combine the warm water and psyllium husk powder. Whisk well and let it sit for 5-10 minutes. The psyllium will absorb the water and create a gel-like consistency, which is crucial for the structure of gluten-free dough.
- Add your active gluten-free sourdough starter and olive oil to the psyllium gel. Stir gently to combine.
- Add the gluten-free bread flour blend, salt, and optional sugar/maple syrup to the bowl.
- Using a sturdy spoon or your hands, mix everything together until no dry streaks of flour remain. The dough will be very sticky and shaggy. Don’t worry about kneading at this stage.
- Cover the bowl with a damp cloth or plastic wrap and let it rest at room temperature for 30 minutes. This allows the flours to fully hydrate.
Step 2: Stretch and Folds (Building Structure)
- After 30 minutes, perform your first set of “stretch and folds.” With wet hands, gently grab a portion of the dough from one side, stretch it upwards, and fold it over to the opposite side of the bowl. Rotate the bowl a quarter turn and repeat this process 3-4 more times, stretching and folding until you’ve worked your way around the dough. The dough will still be sticky but should start to gain a little more elasticity.
- Cover and let rest for another 30-45 minutes.
- Repeat the stretch and fold process 2-3 more times, resting the dough for 30-45 minutes between each set. You should notice the dough becoming smoother and more cohesive with each set. It will still be a much wetter dough than traditional wheat sourdough.
- After the final set of stretch and folds, cover the bowl and let the dough bulk ferment at room temperature (around 70-75°F / 21-24°C) for 4-8 hours. The exact time will depend on the temperature of your kitchen and the activity of your starter. Look for signs of fermentation: the dough should increase in volume by about 20-30%, have a few bubbles on the surface, and feel slightly puffy.
Step 3: Shaping and Cold Proof
- Lightly flour your work surface and hands with gluten-free flour. Gently turn the dough out onto the floured surface. Avoid deflating it too much.
- Gently shape the dough into a round or oval. You can do this by gently tucking the edges under to create surface tension, or by using a bench scraper to pull and round the dough. The goal is to create a tight “skin” on the outside.
- Generously flour a proofing basket (banneton) or a bowl lined with a floured tea towel. Carefully transfer the shaped dough, seam-side up, into the prepared basket.
- Cover the basket with plastic wrap or a clean kitchen towel and place it in the refrigerator for at least 12 hours, and up to 24 hours. This cold proof slows down fermentation, develops flavor, and makes the dough easier to handle.
Step 4: Baking (The Grand Finale)
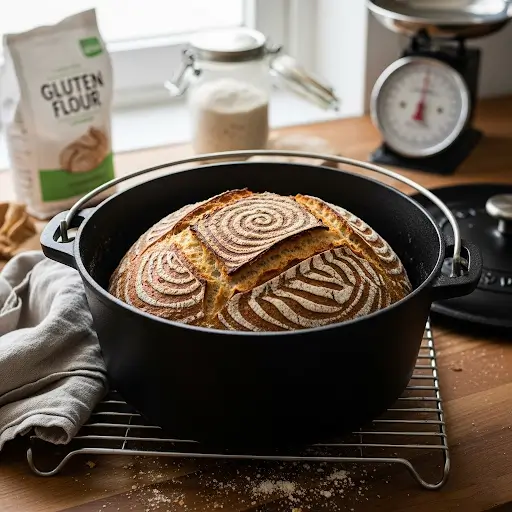
- About an hour before you’re ready to bake, place a Dutch oven with its lid into your oven and preheat to 450°F (232°C). Allow it to preheat for at least 30-45 minutes to ensure it’s scorching hot.
- Carefully remove the hot Dutch oven from the oven. Gently invert the cold dough from the proofing basket directly into the hot Dutch oven.
- If desired, score the top of the dough with a sharp knife or a lame. This helps control where the bread expands and creates a beautiful pattern.
- Place the lid back on the Dutch oven and bake for 30 minutes.
- After 30 minutes, remove the lid. Reduce the oven temperature to 400°F (200°C) and continue to bake for another 25-35 minutes, or until the crust is deeply golden brown and sounds hollow when tapped on the bottom.
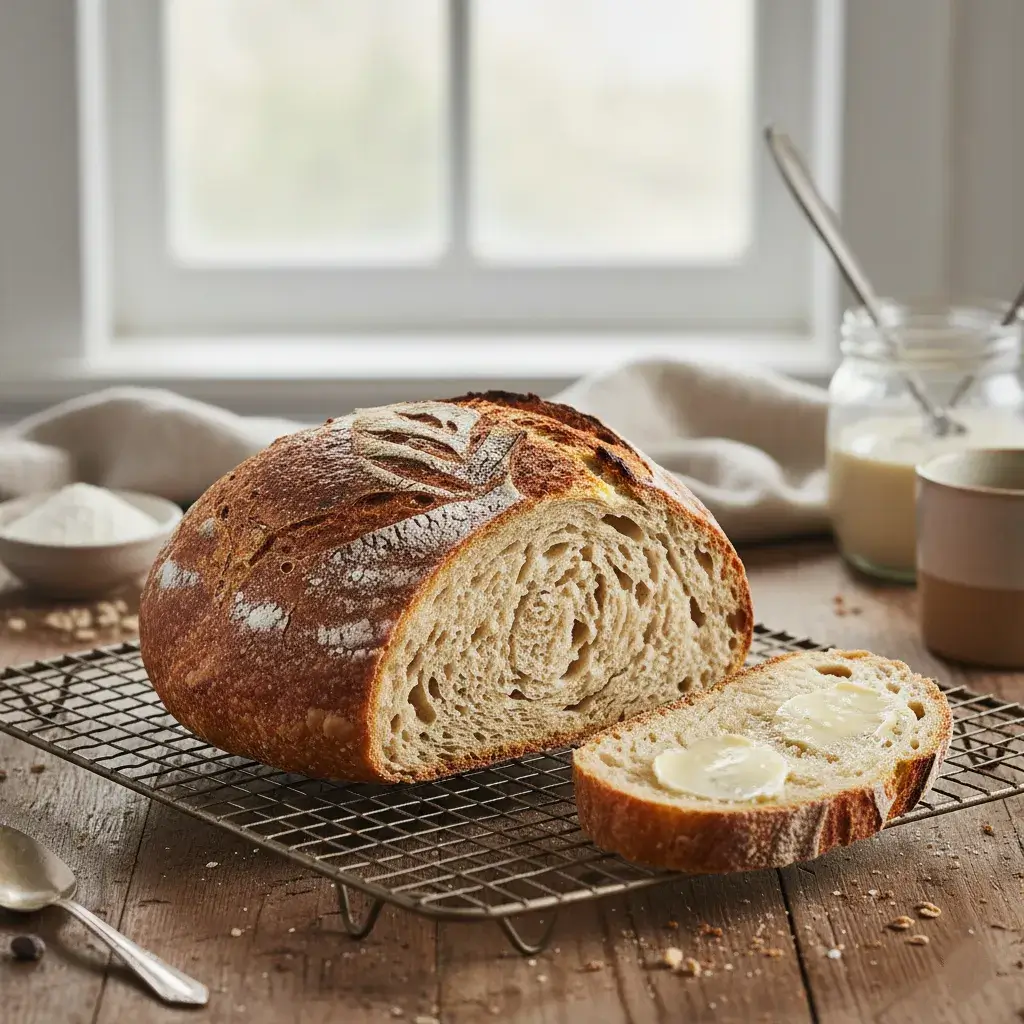
- Carefully remove the bread from the Dutch oven and transfer it to a wire rack to cool completely for at least 2-3 hours before slicing. This is crucial for the crumb to set and for the flavor to fully develop, especially with gluten-free bread.
HOW TO SERVE GLUTEN-FREE SOURDOUGH BREAD
- Toasted with butter and jam for breakfast
- As the base for avocado toast
- With hearty soups and stews
- Thinly sliced for sandwiches
HOW TO STORE GLUTEN-FREE SOURDOUGH BREAD
- Room Temperature: Store in a bread bag or wrapped in a towel for up to 2 days.
- Refrigerate: Store up to 5 days (slice before chilling to make toasting easier).
- Freeze: Slice and freeze for up to 2 months; toast directly from frozen.
TIPS TO MAKE GLUTEN-FREE SOURDOUGH BREAD
TIPS AND NOTES: YOUR KITCHEN COMPANION
Active Starter is Key: This is perhaps the most crucial tip. Your gluten-free sourdough starter needs to be very active and bubbly. Feed it 4-12 hours before you plan to mix your dough, and ensure it has doubled or even tripled in size. A sleepy starter will result in a flat, dense loaf.
Embrace the Stickiness: Gluten-free doughs, especially sourdoughs, are inherently stickier and wetter than their wheat counterparts because they lack the gluten network. Don’t be tempted to add too much extra flour during mixing or shaping, as this will lead to a dry, crumbly loaf. Use wet hands or a well-floured bench scraper for handling.
Psyllium Husk Powder is Your Friend: Psyllium husk powder is a game-changer for gluten-free bread. It acts as a binder, providing elasticity and structure that gluten usually offers. Make sure you use powder, not whole husks, as the absorption rates are different.
Warmth Matters: Sourdough fermentation thrives in a warm environment. If your kitchen is cool, consider finding a warmer spot for your bulk fermentation – perhaps near a sunny window (but not in direct, hot sun), or in your oven with just the light on (be careful not to let it get too hot).
Don’t Rush the Bulk Ferment: While I give a time range, it’s more important to watch the dough, not the clock. Look for visual cues: a noticeable increase in volume (20-30% is ideal), a slightly domed surface, and some small bubbles on top. Underrisen dough will be dense; overrisen will be weak and collapse.
The Cold Proof is Essential: Don’t skip the cold proof in the refrigerator. It greatly improves the flavor, makes the dough much easier to handle and score, and helps achieve a better rise in the oven.
Hot Dutch Oven: Preheating your Dutch oven to a high temperature is vital. This creates a steamy environment that helps the bread achieve a fantastic oven spring and a crispy crust.
Cool Completely: This is probably the hardest tip to follow because the smell is so enticing! However, gluten-free bread needs to cool completely (2-3 hours, or even longer for a very large loaf) before slicing. This allows the internal structure to set and the starches to fully gelatinize, preventing a gummy texture. Patience will be rewarded!
Experiment with Your Flour Blend: Different gluten-free flour blends can yield slightly different results. If you’re not happy with your first loaf, try a different blend next time. A blend specifically designed for gluten-free bread often works best.
DETAILS
- This dough will be wetter and stickier than wheat dough, don’t worry, that’s normal!
- For extra crust, spritz loaf with water before baking.
VARIATIONS
- Add seeds (sunflower, sesame, pumpkin) to the top before baking.
- Use buckwheat or millet flour for different flavor notes.
NOTES
- Every sourdough starter behaves differently. Your rise times may vary depending on room temperature and flour blend.
GLUTEN-FREE SOURDOUGH BREAD FAQS
Can I make this without psyllium husk?
Not recommended, psyllium gives the bread structure. Without it, the loaf will be crumbly.
Do I need a Dutch oven?
No, but it helps create steam for a great crust. You can use a baking stone or tray with a pan of water for steam.
Why is my bread dense?
Likely your starter wasn’t fully active, or the dough didn’t proof long enough. Make sure it’s bubbly before baking.
CONCLUSION
Gluten-free sourdough bread might sound intimidating, but once you’ve got an active starter and a little patience, it’s truly rewarding. With its hearty crust and tender crumb, it proves that gluten-free bread can be every bit as delicious as traditional loaves. Bake a loaf, share it with loved ones, and enjoy the warm satisfaction of homemade sourdough magic.