

Let’s be honest, a gluten free pie crust can feel like the final frontier of baking. For years, I struggled with crumbly, dense, or just plain sad crusts that couldn’t hold a candle to my grandma’s flaky masterpiece. I tried every pre-made option, and while some are decent, nothing beats the satisfaction of making your own.
But who has hours to spare? Friend, I have the answer. This recipe is my kitchen savior. It comes together in just five minutes, requires no special equipment, and yields the most wonderfully tender and flaky gluten free pie crust you’ll ever taste. Seriously, it’s a game-changer.
Why You’ll Love This Gluten Free Pie Crust Recipe
You will fall head-over-heels for this crust because it is incredibly simple. Furthermore, it requires only a handful of ingredients you probably already have in your pantry. Unlike many finicky recipes, this one is forgiving.
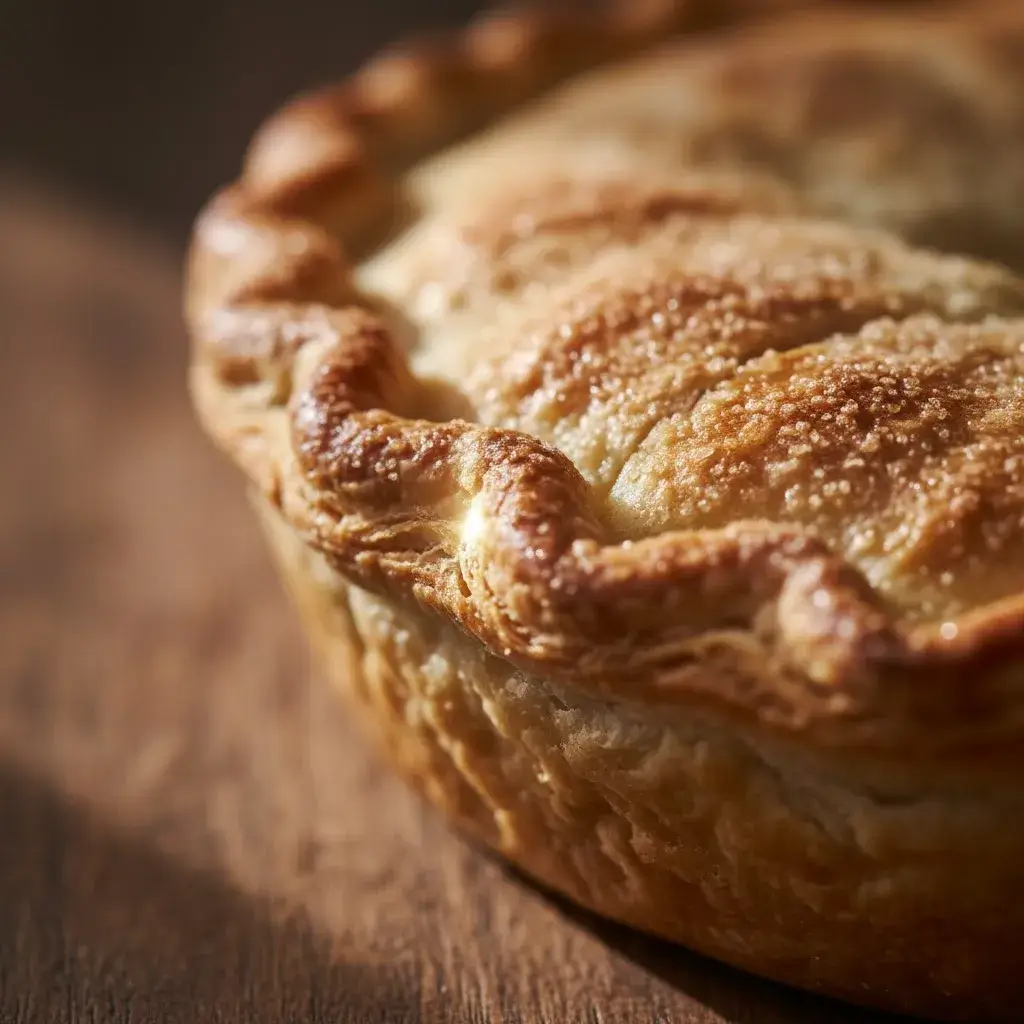
You can press it into the pan without worrying about it tearing, and it bakes up beautifully golden every single time. Most importantly, the flavor is pure, buttery perfection, making it the perfect vessel for both sweet and savory fillings.
Print
5-Minute Gluten Free Pie Crust | So Easy!
- Total Time: 40 minutes
- Yield: 1 pie crust 1x
Description
A tender and flaky gluten-free pie crust that’s perfect for both sweet and savory fillings.
Ingredients
- 1 1/2 cups gluten-free all-purpose flour blend (with xanthan gum)
- 1/2 teaspoon salt
- 1 tablespoon sugar (optional, for sweet pies)
- 1/2 cup (1 stick) cold unsalted butter, cubed
- 1 large egg
- 2–3 tablespoons ice water
- 1 teaspoon apple cider vinegar
Instructions
- 1. In a large bowl, whisk together the gluten-free flour, salt, and sugar.
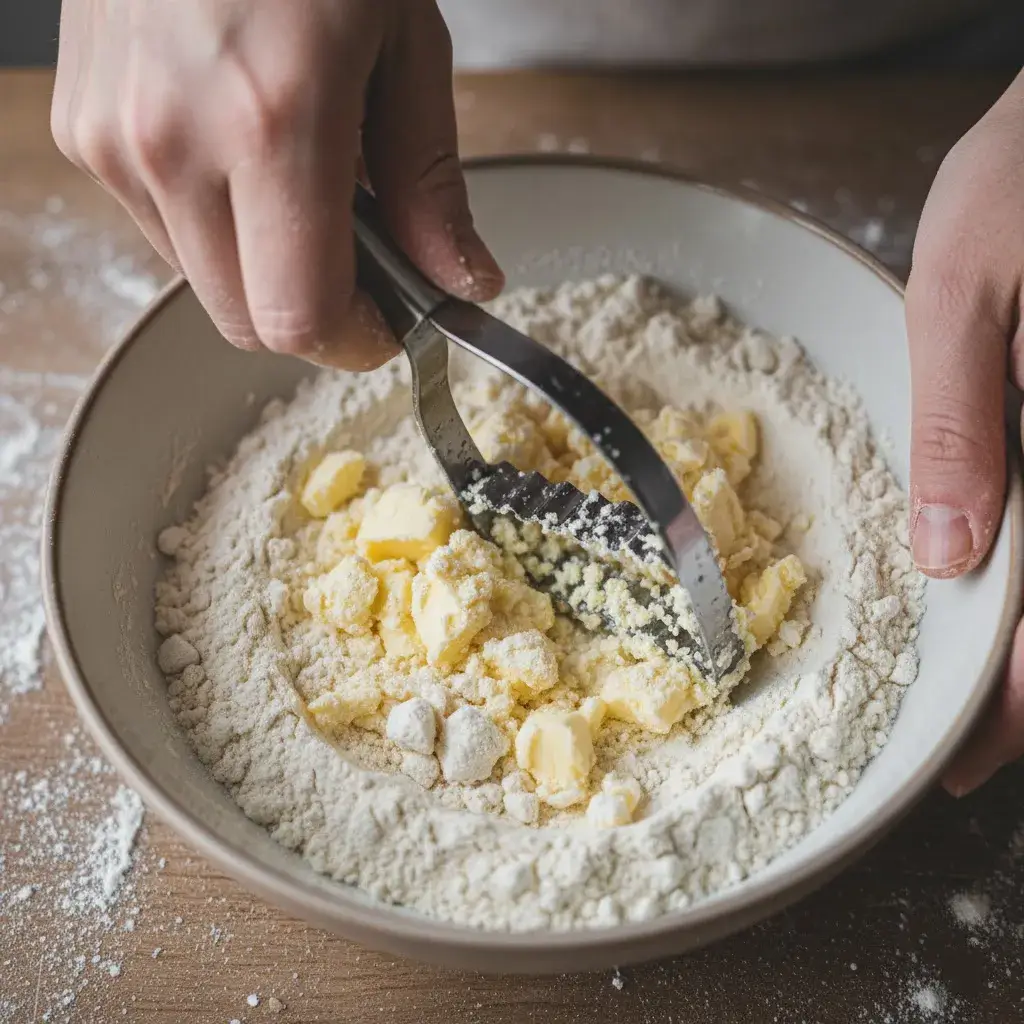
- 2. Cut the cold butter into the flour mixture using a pastry cutter or fork until the mixture resembles coarse crumbs.
- 3. In a small bowl, whisk together the egg, vinegar, and 2 tablespoons of ice water.
- 4. Add the wet mixture to the dry ingredients and stir just until the dough begins to come together.
- 5. If the dough is too dry, add an additional tablespoon of ice water, one teaspoon at a time.
- 6. Shape the dough into a disk, wrap it tightly in plastic wrap, and refrigerate for at least 1 hour.
- 7. Roll the chilled dough between two sheets of parchment paper to fit your pie pan.
- 8. Transfer the crust to the pie pan, trim the edges, and crimp as desired.
- 9. For a pre-baked crust, prick the bottom with a fork, line with parchment, fill with pie weights, and bake at 375°F (190°C) for 15 minutes. Remove weights and bake 5–10 minutes more until golden.
Notes
- Keep all ingredients as cold as possible for a flaky crust.
- You can make the dough up to 2 days ahead and store it in the refrigerator.
- For dairy-free, use vegan butter or coconut oil instead of butter.
- Prep Time: 15 minutes
- Cook Time: 25 minutes
- Category: Baking
- Method: Oven
- Cuisine: American
Nutrition
- Serving Size: 1 slice
- Calories: 180
- Sugar: 1g
- Sodium: 120mg
- Fat: 12g
- Saturated Fat: 7g
- Unsaturated Fat: 4g
- Trans Fat: 0g
- Carbohydrates: 16g
- Fiber: 2g
- Protein: 3g
- Cholesterol: 45mg
Keywords: gluten-free, pie crust, baking, pastry
How to Make Your Gluten Free Pie Crust
This process is so straightforward, you might not believe it until you try it. Essentially, we’re cutting cold butter into a simple flour blend, then binding it with a touch of cold water. The key is to work quickly to keep everything cold.
Ingredients:
- 1 ¼ cups (160g) all-purpose gluten free flour blend (I recommend one with xanthan gum included)
- 1 tablespoon granulated sugar (omit for a savory pie)
- ½ teaspoon salt
- ½ cup (1 stick or 113g) unsalted butter, cold and cubed
- 3-4 tablespoons ice cold water
Directions:
Step 1: Combine Dry Ingredients
- Action: In a large mixing bowl, whisk together your gluten-free flour, sugar, and salt.
- Detailed Breakdown:
- Choose the Right Bowl: Select a large mixing bowl. This provides ample space for incorporating the butter and water later without making a mess.
- Add Dry Ingredients: Add the measured gluten-free flour, sugar, and salt directly into the bowl.
- The Whisk: Use a whisk to blend them together for 30-60 seconds.
- Why This is Important:
- Even Distribution: Whisking ensures that the salt and sugar are uniformly distributed throughout the flour. A pocket of salt or sugar in one part of your dough would result in an uneven flavor.
- Aeration: Whisking incorporates air into the flour, which can lead to a slightly lighter texture in the final crust.
Step 2: Cut in the Butter
- Action: Add the cold, cubed butter. Using a pastry cutter, two forks, or your fingertips, work the butter into the flour until the mixture resembles coarse crumbs with some pea-sized bits of butter remaining.
- Detailed Breakdown:
- Butter Temperature is Key: Ensure your butter is straight from the fridge and cold. Cube it into small, uniform pieces (about ½-inch) before starting.
- Add Butter: Scatter the cold, cubed butter over the top of the flour mixture.
- “Cutting In”:
- Pastry Cutter (Recommended): Press down and through the butter and flour with a pastry cutter, using a rocking motion. Repeat until the desired texture is achieved.
- Two Forks: Press and cut the butter into the flour by crossing the forks through the mixture.
- Fingertips (Quickly!): Using just your fingertips, quickly rub the butter pieces into the flour, lifting the mixture as you go to aerate it. Work fast so the heat from your hands doesn’t melt the butter.
- The Target Texture: Stop when the mixture looks like coarse sand or breadcrumbs, with visible, flat pieces of butter about the size of peas.
- Why This is Important:
- Flakiness: Those solid, cold bits of butter are the secret to a flaky crust. When the dough hits the hot oven, the butter melts, releasing steam. This steam pushes the layers of dough apart, creating flakiness. No solid butter = a dense, mealy crust.
Step 3: Add Water
- Action: Sprinkle 3 tablespoons of ice water over the mixture. Using a spatula, gently stir until the dough just begins to clump together. If it seems too dry, add the remaining tablespoon of water. Be careful not to over-mix.
- Detailed Breakdown:
- Ice Water: Your water must be cold. Add ice cubes to a glass of water and use the water from that.
- Sprinkle, Don’t Pour: Don’t dump the water in one spot. Sprinkle it evenly over the surface of the flour-butter mixture.
- Gentle Stirring: Use a spatula or fork to gently stir and fold the mixture. The goal is to hydrate the flour without activating the gluten (or gum binders in GF flour) too much.
- Check the Dough: After stirring, grab a small handful of the dough and press it in your palm. If it holds together without crumbling, it has enough water. If it falls apart, add the remaining tablespoon of water, one teaspoon at a time, and stir gently after each addition.
- Avoid Over-Mixing: The dough will look “shaggy” and a bit crumbly, but it should hold together when pressed. Over-mixing will make the crust tough.
- Why This is Important:
- Hydration & Structure: The water binds the dry ingredients together.
- Cold is Crucial: Cold water keeps the butter firm. If you use warm water, it will start to melt the butter, compromising the flaky layers.
- Tenderness: Minimal mixing prevents the development of tough structures, leading to a more tender, crumbly crust.
Step 4: Form the Dough
- Action: Immediately, turn the shaggy dough out onto a piece of plastic wrap. Gently press and form it into a disc.
- Detailed Breakdown:
- Prepare Your Surface: Tear off a large sheet of plastic wrap (about 12-14 inches long) and lay it flat on your counter.
- Turn Out the Dough: Dump the crumbly dough mixture directly into the center of the plastic wrap.
- Form the Disc: Use your hands to gently gather and press the dough together. Form it into a flat, round disc (about 1-inch thick). Do not knead it like bread dough. You are just pressing the crumbs together until they cohere.
- Why This is Important:
- Handling: Handling the dough too much will warm the butter. Using the plastic wrap to help form the disc minimizes contact with your warm hands.
- Shape for Rolling: A flat disc chills faster and more evenly than a ball. It also makes it much easier to roll out later, as it’s already started in the right shape.
Step 5: Chill the Dough
- Action: Finally, wrap the disc tightly in the plastic wrap and refrigerate for at least 30 minutes.
- Detailed Breakdown:
- Wrap Tightly: Bring the edges of the plastic wrap up and over the dough disc, twisting them to form a tight, sealed package. This prevents the dough from absorbing any fridge odors and stops the outside from drying out.
- Refrigerate: Place the wrapped dough disc on a shelf in your refrigerator.
- Respect the Time: Chill for at least 30 minutes, but 1 hour is even better.
- Why This is Important:
- Hydration: This allows the flour to fully absorb the water, leading to a more consistent texture.
- Butter Firming Up: It re-solidifies the butter that may have softened during handling. Firm butter is essential for flakiness.
- Relaxation: It relaxes the dough, making it less elastic and much easier to roll out without shrinking back.
Is a Nutrition Hero
Surprisingly, a homemade gluten free pie crust can be a better nutritional choice than its traditional counterpart.
- Firstly, you control the ingredients, meaning no mysterious additives or preservatives.
- Secondly, many gluten free flour blends incorporate whole grains like brown rice, sorghum, or oat flour, which can offer more fiber and nutrients than plain white wheat flour.
Great for Weight Management
Because you are in control, you can make smart swaps to suit your dietary goals. For instance, you can use a high-fiber gluten free flour blend to increase satiety. Additionally, you can ensure a proper portion size, helping you enjoy your favorite desserts without overindulging.
How to Choose and Store Your Gluten Free Pie Crust
Choosing the right gluten free flour blend is the most important step.
- Look for a blend that is meant for 1:1 substitution in baking and contains a binder like xanthan gum.
- Store your unbaked dough disc, tightly wrapped, in the fridge for up to 2 days, or in the freezer for up to 3 months.
- A pre-baked crust can be stored at room temperature for a day or frozen for longer storage.
Easy and Tasty Low-Cal Gluten Free Pie Crust Recipes
This versatile crust is the starting point for so many healthy creations. For a delightful summer tart, try a thin layer of herbed goat cheese topped with sliced peaches and a drizzle of balsamic glaze. Alternatively, for a savory quiche, fill it with whipped eggs, spinach, and mushrooms for a high-protein, low-calorie meal.
Sweet Gluten Free Pie Crust Treats The Healthy Way
Satisfy your sweet tooth without the guilt. This crust is perfect for a yogurt and berry tart. Simply pre-bake the crust, let it cool, then fill it with Greek yogurt sweetened with a touch of honey, and top with a mountain of fresh berries.
Don’t Forget the Seeds!
For an extra nutritional boost and a wonderful nutty flavor, try adding two tablespoons of ground flaxseed or chia seeds to your dry ingredients. Consequently, this not only adds healthy omega-3s and fiber but also helps to create a sturdier, more forgiving dough.
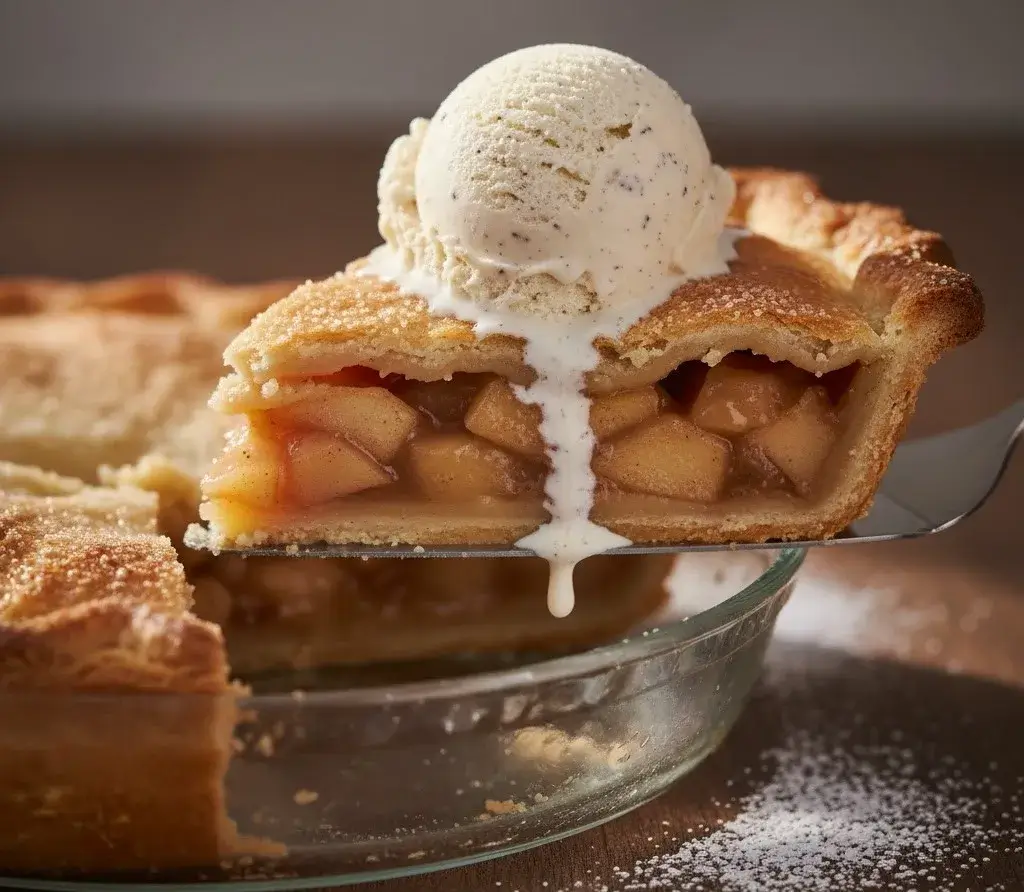
How to Serve Your Masterpiece
This Gluten Free Pie Crust is a true all-rounder. Serve your sweet pies warm with a scoop of vanilla ice cream for the ultimate comfort food experience. Conversely, serve your savory quiches and tarts at room temperature for an elegant brunch or easy weeknight dinner.
How to Store Your Finished Pie
A fruit-filled Gluten Free Pie Crust can be stored covered at room temperature for about two days. However, any pie with a dairy-based filling, like custard or pumpkin, must be stored in the refrigerator. For longer storage, you can freeze the entire baked pie for up to three months.
Tips to Make the Perfect Crust Every Time
Tips and Notes: Your Kitchen Companion
Details: The single most important tip is to keep everything cold. I even put my bowl and pastry cutter in the freezer for 10 minutes before I start. Cold butter equals flaky layers.
Variation: For a dairy-free version, simply substitute the cold butter with an equal amount of high-quality vegan butter. Make sure it’s very cold for the best results.
Notes: Do not skip the chilling step! Chilling the dough relaxes the gluten-free proteins and re-solidifies the butter, which prevents a tough crust and guarantees those beautiful, flaky layers we all love.
FAQs
Can I use gluten free flour for a pie crust?
Absolutely! That’s exactly what this recipe is for. Using a good all-purpose gluten free flour blend is the key to a successful gluten free pie crust.
What are the three ingredients in gluten free pie crust?
The most basic three-ingredient crust would be gluten free flour, cold fat (like butter or shortening), and cold water. This recipe includes a little sugar and salt for flavor, which I highly recommend.
Is Pillsbury pie crust gluten-free?
No, unfortunately, the classic Pillsbury refrigerated pie crusts are not gluten-free. They are made with wheat flour.
Is there gluten in pie crust?
Traditional pie crust is made with wheat flour, which contains gluten. Therefore, a standard pie crust is not safe for those with celiac disease or a gluten sensitivity.
Final Thoughts Let’s Make This!
I promise you, this gluten free pie crust will change your baking life. It’s fast, it’s easy, and it delivers incredible results. So, grab your bowl, get that butter cold, and let’s make a pie worth celebrating. Happy baking!